Activities Q1/3
Ongoing
Extra fun
Vocabulary
Templates
Open template, save a copy to your C drive, edit
Downloads, Tutorials
Royalty Free Images, Audio, and Video
Tips and General Help
In preparation for this activity, we will brainstorm available AI imaging platforms as a class.
Learning objectives: By the end of this activity, you will be able to:
Step One
Review the shot types viewable via the links below. These links also appear on the main menu at left:
Step Two
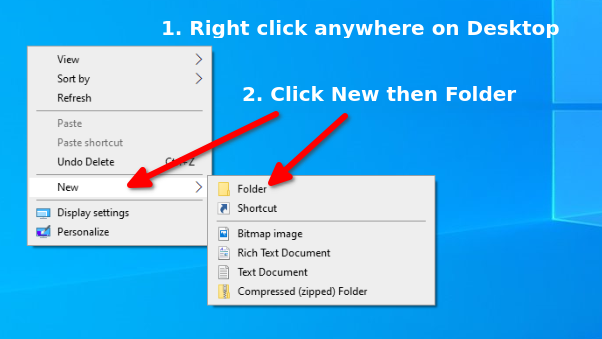
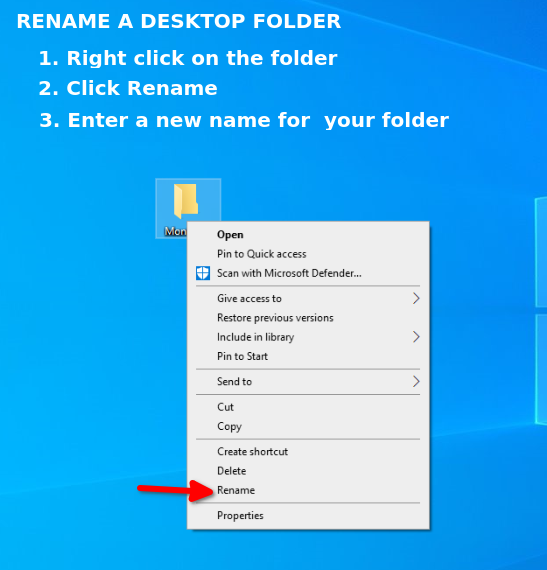
Create a folder for this activity within your class folder on your Desktop. Name the folder shot_types2 or something similar. You will be saving your shots to this folder.
Plan your shots using one of our shot list templates. Here is the simplest one.
Step Three
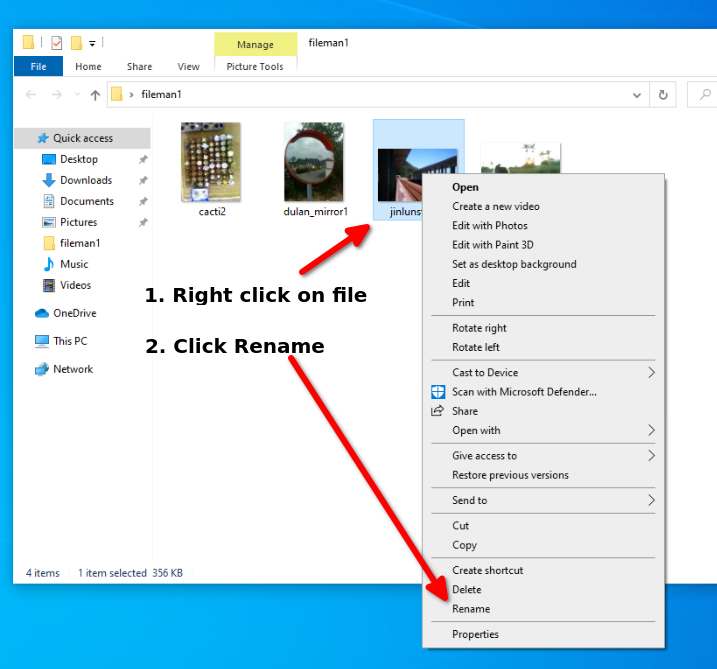
Use the AI imaging platform of your choice to create your shots. Note that Photoshop now has a built in AI function, but you can use any platform you like. As you create each shot, download it to your project folder and rename it. Note that you can rename is as you download it or after you download it.
Step Four
Upload the entire folder you created in Step Two to your class folder on Google Drive.
Step Five
Get a shareable link for the folder you just uploaded to Google Drive and turn in that link on Google Classroom.
EXTRA!
The best examples of different shot types will be printed and displayed in the hallway with students' permission. We'll talk about this in class.
Need a challenge?
Try any of the following:
Remember, everyone must be working on this activity in some fashion as long as class time is being used for the activity.
How-to Videos
Is there a how-to video you'd like to see here? Let your instructor know!